As humans, we need oxygen to breathe. A vehicle needs oxygen for a good combustion process; the air filter keeps the fuel and air mixture in good condition. That is why knowing the proper answer for how to clean a K&N air filter can make a huge difference. Before we discuss the main topic, you need a good understanding of how the K&N air filter works. So, let us talk about that for a moment.
Use of a K&N Air Filter
As mentioned in the introduction, an air filter can maintain a good mixture of fuel and air. It also prevents dust, insects, particles, debris, or sand from reaching your engine. Air filters come in different shapes, such as circular panels or cylindrical.
Difference Between Ordinary Air Filter and K&N
“K&N air filters are available for cars, motorcycles, trucks, ATVs, and other vehicles; most of the air filters in the market are not reusable; you will need to replace them regularly.”
On the other hand, K&N air filters are reusable, washable, and designed to last a long time. They fit perfectly into your vehicle’s airbox, so you do not need to make any adjustments. The installation would only take five minutes unless you ordered the wrong model.
Why Do I Have to Clean My K&N Air Filter?
Most people do not realize that even the K&N air filter needs a good cleaning occasionally; they will install the air filter and forget about it entirely. But, as mentioned above, you need to clean the air filter properly to maximize its performance.
“Even though K&N air filters have a million-mile warranty, that does not mean it’s invulnerable. With every mile your vehicle travels, air filters collect dust and filth nonstop; so, to keep the air filter in good shape, you need to clean it.”
When to Clean the K&N Air Filter?
Before learning how to clean the K&N air filter, you should know when to do so. Let’s discuss that.
First, follow the basic procedure. You should check your air filter every 25000 miles. This visual inspection will help you understand any issues with the K&N air filter. However, if you are driving on a dusty or dirt road, this might change. You will have to check the filter regularly because there might be more dust and dirt in it.
Also, some K&N air filters might not need cleaning until 50000 miles, and filters like the K&N large conical filter will need cleaning after 100000 miles. These numbers can change depending on your driving skills and conditions.
Symptoms of a Dirty K&N Air Filter
Apart from the above point, some common symptoms suggest an issue with your air filters. If you encounter the following symptoms, you should examine the vehicle with the help of a professional.
- Misfiring engine
- Check if the engine light is on or blinking
- Reduced power from the engine
- Higher fuel economy
- Unusual sound from the engine
- Dark and black smoke coming out of the exhaust pipe
- Engine pulling, lagging, or tugging
If you ignore these symptoms, the results can be disastrous. Hence, you should act immediately.
Cleaning the K&N Air Filter
“Even though the K&N air filter is famous for its durability and long lifespan, you should clean it regularly; Also, its reusable quality is very beneficial for you.”
All you need to do is clean your old K&N air filter, which will be ready for you to use again. This section will discuss how to clean a K&N air filter. Follow the below steps correctly to get the best performance from your K&N air filter.
Removing and Cleaning the Filter
Step 1: Remove the Filter
Open the hood of your vehicle. Now, you can see all of the engine compartments. Find the air filter, usually located in a large plastic box. You can identify the air filter quickly. If it is attached to any ring clamps or latches, disengage them and separate the air filter. Now lift it outside.
Tips
- Depending on your vehicle’s model and make, the air filter might be circular, flat, or conical in shape. However, this will not affect the cleaning process at all. You can use the same cleaning method for any shape.
- After lifting the air filter, cover the intake port with a towel to protect the engine from debris.
Step 2: Examine the Filter
K&N highly recommends that you clean the air filter only if its folds are covered with dust and debris. If you can see the pleats on the filter clearly, you do not need to clean it. Sometimes, it might look dirty, but you do not need to clean it.
Tips
- If the air filter looks fuzzy, clogged, or has no reddish oil coat, you need to clean it.
Step 3: Shake off Loose Dirt and Dust
Shaking your filter can remove a lot of loose dirt and dust. So, please give it a gentle shake, which will dislodge the debris on the outer surface. While doing this, we recommend eye protection and a face mask; do not inhale the dust or dirt. Also, do not shake the air filter too hard; this could damage the pleats.
Tips
- Use a soft bristle brush instead of shaking; it will not harm the air filter.
- If you do this procedure outside, it will make less of a mess.
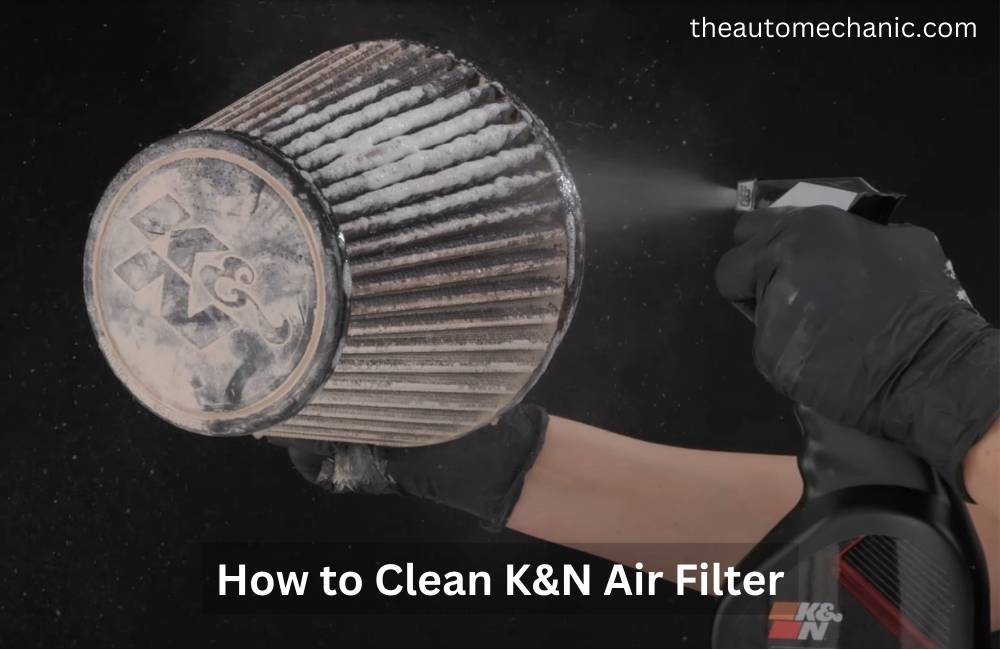
Step 4: Using a Cleaning solution
Find an aerosol cleaner that comes with your air filter. Spray the solution on both sides of the air filter. Properly spray the inner and outer surfaces and pleats with the cleaning solution.
Tips
- Do not leave the air filter half sprayed; Spray as much as needed for both sides of the filter.
- If you do not have a cleaning solution for your K&N air filter, you can easily buy one online or at a store.
Step 5: Let the Cleaning Solution Soak Up the Air Filter
After spraying the cleaning solution, let it sit on the air filter for at least 10 minutes. This time will allow the cleaning solution to break through the grime, making your life much easier while rinsing. While this happens, you should place the filter on a towel or a sink to collect the separated grime and other junk. Otherwise, it will ruin your workplace.
Rinsing and Drying the Air filter
Step 1: Use Cool water to Rinse
In this step, we will describe the cleaning process. After the cleaning solution breaks down the grime, tap or hose to direct water to the air filter; use cold water and a light waterline. Ensure that the water goes through the inner and outer sides of the air filter; if done accurately, water will carry through broken-down dirt and dust nicely.
Tips
- Do not rinse the outside of the filter. Doing so will force dirt and dust further into the air filter.
- When you have an old and filthy air filter with lots of dirt and dust attached, you must repeat the rinsing process.
Step 2: Removing Excessive Water
After the rinsing, your air filter will have some excess water. To remove this excess water, let the filter lay on another object at an angle; try other methods to remove this remaining water, and remember not to damage the filter during this process.
Tips
- Cover or set the filter on a clean towel to absorb the remaining water more quickly.
- Placing the filter in a well-ventilated area will speed up the drying process.
Step 3: Let the Air Filter Dry Completely
The air filter will dry in six to eight hours. So, if you plan to service your air filter, pick a time when you won’t need to drive anywhere.
Tips
- You should never apply oil while the filter is still wet
- Install a temporary disposable air filter until the K&N air filter’s cleaning process is completed if you cannot wait.
Oiling the Air Filter
Step 1: Apply the Oil Section by Section
This is the last section about cleaning a K&N air filter. After drying the filter, you are ready to apply the oil. First, ensure that the filter is not wet; then, find the oil bottle. Usually, the KN air filter recharge kit comes with a separate oil bottle or spray. Then, spray or apply the oil directly onto the wrinkles.
“If you are using a spray, hold the filter a few inches away from the spray bottle’s nozzle; this makes sure that the oil coats properly.”
On the other hand, if you are using an ordinary squeeze bottle, apply the oil parallel to the pleats.
Tips
- Usually, K&N oil comes with a subtle red dye, which helps recognize the area of the air filter that has already been applied.
- If any excess oil is on the filter, wipe it out with a paper towel.
- While applying the oil, do it in a well-ventilated area; doing this outside is the best option.
Step 2: Wait For At least 20 Minutes
After applying the oil, wait for 20 minutes; this will ensure that the oil wicks into the surface of the air filter properly. Usually, the oil acts as an external barrier against dust and dirt.
Tips
- The oil collects dirt and dust that enter the filter and prevents it from entering the engine.
Step 3: Replace the Air Filter Correctly
If you did everything accordingly, you can place the air filter back in the engine compartment. First, remove the towel from the intake port you placed at the beginning of this cleaning process. Place the K&N air filter inside the large plastic box and reattach any clamps and clips you had to disengage earlier. Finally, close the hood, and if you follow this process correctly, your K&N air filter is ready for another 50,000 miles.
Tips
- You should check the K&N air filter every 25000 miles. Otherwise, you never know when it needs service. If you regularly drive on a dirt road, you must check the filter more often.
How Often Should I Clean My K&N Air Filter?
It entirely depends on your driving condition. Even though K&N recommends cleaning the air filter after 50000 miles, you should check it at least every 25000 miles. This will change if you drive in a harsh condition, like a dirt road; you must check the air filter more often.
“Also, understanding the maintenance interval is crucial; so, check your manual and find out about the maintenance intervals.”
At every maintenance interval, you should clean your air filter. After all, K&N air filters are reusable, so cleaning them would not be a problem. The more you clean the filter, the better it will get. Several factors can affect the air filter’s cleaning interval. Some of them are mentioned below:
- How often do you use the vehicle?
- The weather conditions of your living area
- Particle types in the air
- Any modification that you have done after purchasing the vehicle
The above factors will impact the cleaning interval. However, for K&N air filters, 50000 miles is the recommended cleaning interval. But make sure to check it at least after 25000 miles.
Wrap-Up
If you still have trouble finding answers to how to clean the K&N air filter, we suggest going through the above cleaning process again. Cleaning the K&N air filter can greatly increase its lifespan; hence, check the filter regularly when you have the time.

Bruce William is a professional content writer and vehicle engineer with extensive car maintenance and repair knowledge. His expertise spans all vehicle parts, offering practical solutions for various automotive issues. Bruce provides valuable insights through his website articles to help readers maintain their cars for optimal performance and longevity.